A bluebird forecast can look perfect from a desk in the UK, yet the top lift may be on wind hold and the home run may be turning soft by lunchtime. Ski resort webcams are one of the quickest ways to narrow the gap between a forecast and what is actually happening on the mountain. Used well, they can shape anything from your outerwear choice to whether you take the first lift, book a lesson, or point the car towards a different valley.
They are not a substitute for a proper snow report, avalanche bulletin or lift-status page. A camera shows one view at one moment, often from a carefully chosen position. But for skiers and snowboarders trying to make sound decisions around a precious week away, live images provide valuable context that statistics alone cannot.
What ski resort webcams can really tell you
The most useful webcam is not necessarily the one with the prettiest panorama. Look for cameras at different elevations: a village view, a mid-mountain lift station and a high point near the top of the ski area. Together, they give a more honest picture of the day.
At resort level, pay attention to the trees, roofs and roads. Fresh snow on the village is encouraging, but it says little about the upper slopes. Wet pavements, dripping eaves and patchy snow at low altitude may mean spring conditions below, even if the glacier or north-facing terrain remains in excellent shape.
Higher up, the important clues are visibility, wind and surface coverage. Can you clearly see the next ridge, lift towers or piste markers? If not, flat light or cloud may make a big open area challenging, particularly for less confident skiers. Watch exposed chairlifts and summit stations for blowing snow, rime building on structures, or a camera shaking in the wind. These are signs that lifts could be delayed or closed, whatever the forecast icon says.
A camera also gives a useful sense of how a resort is skiing. Groomed corduroy early in the day suggests a strong piste morning, while shiny, scraped sections beneath a busy chairlift can hint at firm snow or heavy traffic. In a warm spell, lower runs that look dark, narrow or crowded by late morning may be best tackled first.
Read the image, not just the snowfall total
A reported 20cm of new snow sounds straightforward. In reality, where it fell, what lay beneath it and what the weather did afterwards will determine whether it delivers an all-time powder day or a thin cover over hardpack.
Start with the terrain in view. Fresh snow sitting on branches, piste fences and lift-station roofs is a clear visual marker. On open pistes, look at the contrast between groomed lines and the surrounding snow. If everything appears smoothly rounded, the resort may have received a meaningful deposit. If rocks, grass or brown patches remain visible on key lower slopes, the headline total has not transformed the whole area.
Light matters here. Low winter sun can make ordinary packed snow look deep and dramatic, while a grey day can flatten every contour and make good cover look unconvincing. Compare several cameras, ideally facing different directions, and look at images over a few hours rather than treating one screenshot as the final word.
For powder hunters, webcams are particularly helpful after the storm. A clear image of wind-blown ridges, stripped-off knolls or heavily loaded gullies tells you that conditions will vary sharply across the mountain. That is not a prompt to make off-piste assumptions from a screen. It is a reminder to check the local avalanche information, use appropriate equipment and make conservative choices with a qualified guide where needed.
Match the camera to your day on snow
The right interpretation depends on what you want from the day. A family with beginners has different priorities from a group chasing steep, high-altitude terrain, and both may be looking at the same resort.
For beginners and families
A village or nursery-slope camera is often more valuable than a summit panorama. Check whether the learning area is visible, whether snow cover reaches it, and whether fog has settled at resort level. A sheltered, tree-lined sector can be a much better choice than a broad, exposed bowl when visibility deteriorates.
Queue length matters too. Cameras near base lifts can reveal the difference between a calm midweek start and a packed Saturday changeover. If the main gondola is already busy, consider a later breakfast, a quieter lift from another village, or a morning lesson that starts away from the bottleneck.
For piste skiers and snowboarders
Use webcams to plan the order of your runs. On cold, clear days, sun-facing pistes may soften beautifully by late morning, while shaded runs stay firmer for longer. In spring, reverse that logic: ski lower sunny terrain early, then move higher or onto north-facing slopes once it turns slushy.
Snowboarders should be especially alert to flat-light conditions on wide pistes and rolling cat tracks. A webcam cannot show every subtle undulation, but a white-out upper mountain is a fair warning that depth perception may be poor. Tree runs or pistes with stronger visual definition can make for a far more enjoyable session.
For advanced riders
High-altitude cameras can help identify whether the upper mountain is worth the effort. They may show a cloud inversion, fresh cover above the treeline or a wind-affected summit that will not be opening soon. This is useful information, but it still needs to be balanced against lift operations, piste maps and local advice.
Do not mistake untouched-looking snow in a webcam frame for accessible or safe terrain. Cameras crop out hazards, hide scale and cannot tell you what has happened on the slope since the image updated. The best use of the image is to ask better questions at the lift station or with a guide, not to replace mountain judgement.
The timing trap: live is not always live
Many resort cameras refresh every few minutes, but some update less frequently or display an image captured earlier in the day. Check the timestamp before interpreting cloud, crowds or snowfall. A glorious image from 09:00 is of limited help if you are deciding what to do at 14:30.
It is also worth checking local time. Resorts in the Alps, North America and Japan may label their feeds differently, and a UK browser can add another layer of confusion. If the light in the image does not match the stated time, treat it cautiously.
A useful habit is to look at the same camera on consecutive mornings before travelling. You will quickly learn its quirks: perhaps it faces east and is dazzled after sunrise, perhaps its lens gathers snow in a storm, or perhaps it is positioned above the cloud line and consistently paints a more optimistic picture than the village feels.
Build webcams into your pre-trip routine
In the week before departure, use cameras alongside the resort snow report, weather forecast and lift information. No one source tells the whole story. A good forecast with a poor live view may indicate temporary cloud, while a promising webcam image with multiple lift closures could mean that wind is the controlling factor.
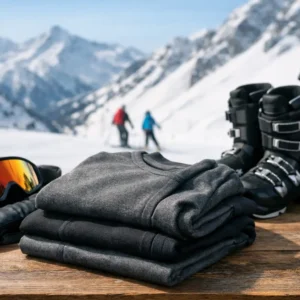
The evening before skiing, check the lower and upper mountain views. This helps with practical kit decisions: a spare low-light lens, warmer gloves, a light mid-layer for spring, or a more weatherproof outer shell. It can also influence where you stay on the mountain. If the forecast is murky and the tree line is clear, there is little point insisting on a summit itinerary.
On holiday, make webcams part of breakfast rather than an obsession. Conditions can change rapidly, and a camera is there to help you choose a sensible starting point, not to drain the spontaneity from the day. The mountains still reward a little flexibility.
Common mistakes when using resort cameras
The biggest mistake is taking one image in isolation. A single sunny lower-slope camera can conceal cloud and wind higher up, while a summit camera inside a cloud bank can make an otherwise skiable resort look hopeless. Compare altitude, aspect and the time each image was taken.
Another is judging snow depth solely by piste appearance. Resorts groom, farm and maintain snow intensively in key areas. A piste can look immaculate while off-piste cover is thin, or look slightly worn while conditions on shaded upper slopes remain very good.
Finally, remember that webcams are often promotional as well as practical. Resorts understandably choose attractive viewpoints. That does not make them misleading, but it does mean you should actively seek the less glamorous evidence: base stations, valley runs, car parks and exposed ridgelines.
The best mountain days are rarely dictated by one forecast, one camera or one plan. Check the views, read the wider conditions, then get your boots on and respond to the mountain in front of you. That is where a well-timed webcam becomes genuinely useful: not as a promise, but as a better starting point for the day.